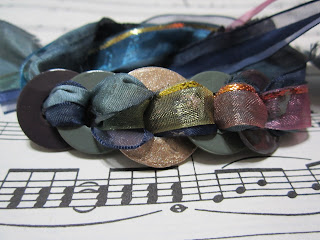
DIY Dainty Washer Bracelet
I love small dainty bracelets and I especially love these! They are cute, girly and totally customizable not to mention CHEAP!I spent about 60 cents per bracelet! And the best part is that you most likely you have everything laying around your house (except maybe the washers). So hurry up and hit up your local hardware store and get to crafting.
Materials:
- Washers
- Nail Polish
- Clear top coat
- Ribbon or strips of fabric cut into 1/4 to 1" thick
- scissors
- Tape
- Line paper
- cutting board
30min
Step 1
Start by laying your line paper on top of your cutting board and decide on a color palette.
Step 2
Decide on a pattern and space one line apart.
Step 3
Start off by painting the edges and then moving on to the top. I found that in order to get the color opaque 3 to 4 coats were required.
Tip
Just like painting your nails start off with thin even coats and allow drying time between coats.!Resist the urge to pack on the polish in one sweep!
Step 4
Paint the rest of the washers and apply a clear top coat. Once Completely dry flip over and repeat. ( I used Sally Hansen Dries instantly Top Coat to speed up the process)
Step 5
Determine the length of the ribbon by wrapping it around your wrist and allowing 4-5 extra inches snip excess.
Step 6
Take the ribbon and place it at the edge of the tape and start rolling it as tight as you can.
You should end up with something like this.
Step 7
Tread the "needle" through the washer stopping 4 to 5 inches from the end of the ribbon.
Step 8
Tread a second washer stopping a fingers width apart
Step 9
Take the needle and feed it through the center of the first washer, completely jumping over the second washer. Keep the Ribbon flat and even.
Step 10
loop the needle back around and thread it through the center of the second washer. ( your creating a figure 8)
Step 11
Pull both ends of the ribbon tightly to secure the washers.
Repeat steps 8 through 11 ( Remember the needle gets treaded through the center of the previous washer and then loops back around to the next washer.)
Step 12
All done!
These are a few I made, I added multiple ribbons and alternated the colors.
\


